Table of Contents
Turning on your preferred song or a thrilling movie scene only to be greeted with crackling, warped noise or worse, total quiet is among the most upsetting situations. A blown speaker can immediately spoil the mood, whether it’s your car speakers, home theatre system, or portable Bluetooth gadget. Though your first reaction would be to throw it or phone a technician, what if you could repair it at home on your own?
Yes, repairing a speaker might sound like a job for an audio engineer, but with the right tools, clear guidance, and a little patience, even beginners can get the job done. This do-it-yourself manual is not only about cutting costs; it’s about giving your equipment a second chance and picking up a useful ability along the way.
You will learn how to identify the symptoms of a blown speaker, what causes it, and step-by-step instructions to revive it—no elegant workshop needed—in this in-depth article.
Let’s get right into fixing that blasted speaker once and for all.
1. What Is a Blown Speaker?
A blown speaker refers to any speaker driver that has suffered mechanical or electrical failure. This could involve:
- A torn cone
- A damaged voice coil
- A burnt-out crossover
- Broken suspension components
These damages affect the speaker’s ability to move air efficiently, resulting in reduced or distorted sound—or no sound at all.
2. Common Symptoms of a Blown Speaker
Before jumping into repairs, it’s important to identify the problem. Here are common signs of a blown speaker:
| Symptom | Explanation |
| Distorted sound | Even at low volume, the audio sounds fuzzy or unclear. |
| No sound | The speaker is completely silent. |
| Rattling or buzzing | Internal parts may be loose or misaligned. |
| Limited frequency range | Missing highs, mids, or bass frequencies. |
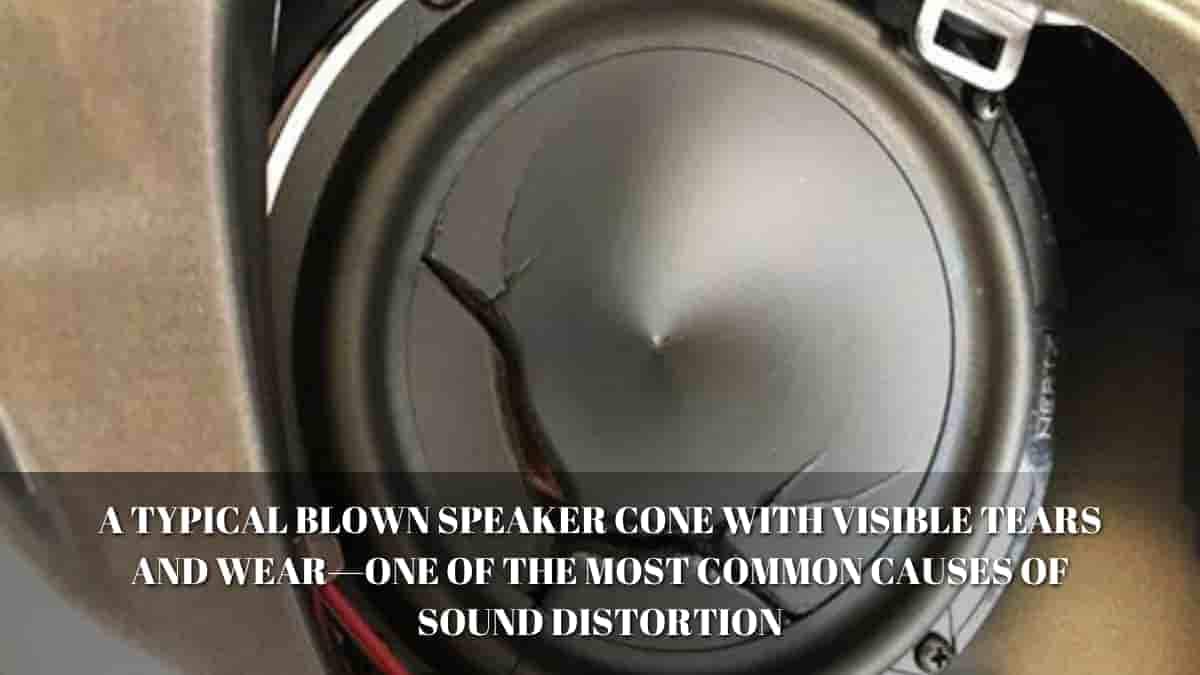
| Visible cone damage | Tears or holes in the speaker cone. |
If any of these symptoms appear in just one speaker, it’s likely that individual unit is blown.
3. Causes of Speaker Damage
Understanding what caused your speaker to blow can help you avoid repeating the same mistake. Common causes include:
- Overpowering: Sending more wattage than the speaker can handle.
- Underpowering: Using an amp too weak to support the speaker, causing distortion.
- Physical damage: Dropping or poking the speaker cone.
- Aging components: Wear and tear over time can cause voice coils or suspensions to fail.
- Moisture: Exposure to water or humidity, especially in car or Bluetooth speakers.
4. Tools You’ll Need
Here are the basic tools and materials required for a DIY repair:
| Tool/Material | Purpose |
| Screwdrivers (Philips & flathead) | For opening speaker enclosures. |
| Multimeter | To test electrical continuity. |
| Soldering iron & solder | For fixing or replacing wires and voice coils. |
| Epoxy or super glue | To seal torn cones or gaskets. |
| Replacement parts | Speaker cones, surrounds, or coils as needed. |
| Utility knife or scalpel | For precision cutting. |
| Foam or rubber surround kit | For reconing. |
5. Step-by-Step: How to Fix a Blown Speaker at Home
Step 1: Disconnect and Inspect
- Unplug or disconnect the speaker from the power source or amplifier.
- Remove the grill or cover to inspect the cone.
- Look for tears, warps, or dents in the cone.
- Gently press the cone in—listen for any scraping or irregular resistance.
Step 2: Test with a Multimeter
- Set your multimeter to the ohms (Ω) setting.
- Place the probes on the speaker terminals.
- A working speaker should show resistance between 4–8 ohms.
- If the reading is “0” or “infinite,” the voice coil is likely damaged.
Step 3: Repair a Torn Cone
- Clean the surface around the tear.
- Apply a thin layer of glue or epoxy on both sides of the tear.
- Use a soft brush or cotton swab for precision.
- Let it dry for several hours.
- Test the speaker with low volume.
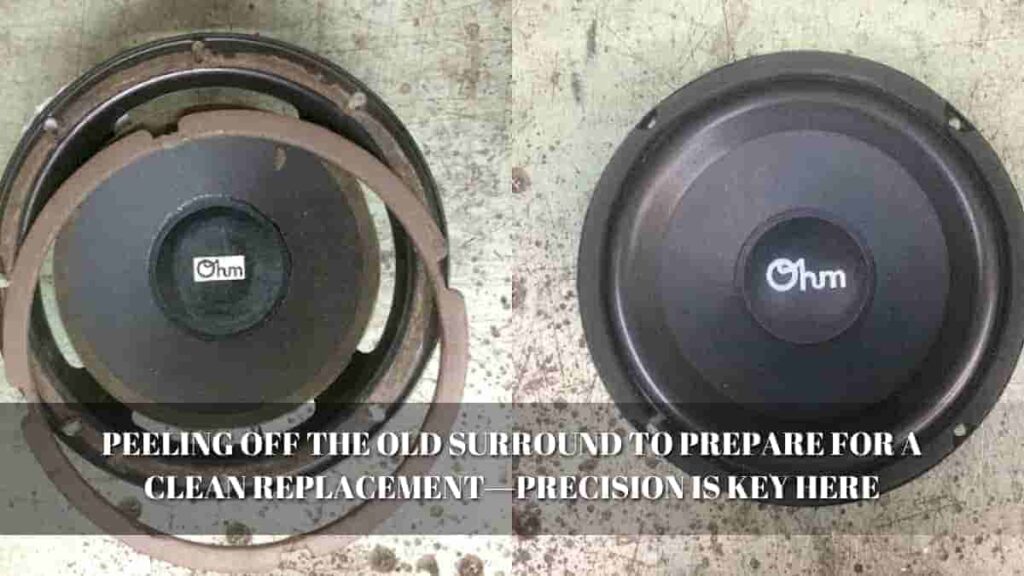
Step 4: Replace the Surround
- Remove the old foam or rubber surround carefully.
- Clean the area with rubbing alcohol or a mild adhesive remover.
- Glue the new surround into place.
- Align it precisely to avoid cone misalignment.
- Let it dry completely.
Step 5: Rewind or Replace the Voice Coil (Advanced)
If you’re comfortable with electronics:
- Remove the speaker from its frame.
- Desolder the damaged coil.
- Purchase a replacement voice coil of the same resistance (Ω).
- Solder it into place, ensuring correct alignment.
- Reassemble and test.
6. How to Fix Different Types of Speakers
🔧 Car Speakers
- Remove the door panel or dashboard trim.
- Test wiring to ensure the issue isn’t a faulty connection.
- Replace the speaker cone or surround using a repair kit.
- Avoid taping tears—use proper materials for sound clarity.
🔧 Home Theater Speakers
- Identify which speaker in the surround system is damaged.
- Use a multimeter to test for dead drivers.
- Recone or replace the damaged driver.
- Ensure polarity (positive/negative terminals) is correctly connected during reassembly.
🔧 Bluetooth or Portable Speakers
- Unscrew the housing with a precision screwdriver set.
- Check for loose wires or battery issues first.
- Replace the internal speaker module if it’s non-functional.
- Reconnect all wires and seal the casing tightly.
7. When to Replace Instead of Repair
Repairing may not be ideal in all cases. Here are some situations where replacing is better:
| Scenario | Reason |
| Severely burnt voice coil | Cost and complexity outweigh benefits. |
| Water-damaged internal electronics | High chance of corrosion and future failure. |
| High-end audio systems | OEM parts are better than DIY fixes for quality. |
| Outdated or low-cost models | Cheaper to replace than to repair. |
If repair costs exceed 50% of replacement cost, replacement is typically the smarter choice.
8. How to Prevent Speaker Damage in the Future
✅ Use the Right Amplifier
Always match the amplifier’s power output and impedance with the speaker’s specs.
✅ Avoid High Volume for Long Periods
Prolonged exposure to high volume stresses the speaker components, especially the voice coil and suspension.
✅ Keep Speakers Dry
Moisture is a leading cause of damage in both indoor and outdoor setups.
✅ Secure Mounting
Loose installation leads to vibrations, misalignment, and premature wear.
✅ Regular Maintenance
Dust buildup or pet hair inside the speaker grill can block airflow and affect sound quality. Clean periodically.
Final Thoughts

Though fixing a blown speaker can seem intimidating, with the proper tools and a patient approach you may have your audio system restored without costing too much money. The main idea is to correctly identify the problem, assess its fixability, and move slowly.
Dealing with a burnt voice coil or crossover network demands more sophisticated expertise, but repairing minor tears or replacing surround systems is newbie-friendly. Should you be unsure, speak with a professional or assess the cost of replacement against that of repair.
Still, the satisfaction derived from manually restoring a damaged speaker is worth the effort. Grab your tools, roll up your sleeves, and bring your sound system back to life therefore.
FAQs
Q1: Can you fix a blown speaker with tape?
You can temporarily patch small tears in a speaker cone using tape, but this is not recommended for long-term use as it distorts sound.
Q2: Is it dangerous to use a blown speaker?
It’s not typically dangerous, but it can damage your amplifier due to mismatched impedance or feedback loops.
Q3: How long does a DIY speaker repair last?
If done correctly with quality materials, a DIY repair can last years, especially if you handle your audio setup carefully afterward.
Q4: Can all blown speakers be repaired?
No. Severely damaged or burned-out components often need full replacement.
Q5: What’s the average cost of repairing a speaker?
DIY repair may cost $10 to $50, depending on parts. Professional repairs range from $50 to $150 or more.